
How to push UTM parameters to Salesforce
Map SourceLoop UTM and source fields to Salesforce Lead, Contact, Account, and Opportunity records, including the standard LeadSource field.
On this page
- Before you start
- The fields SourceLoop can push
- Creating the fields
- Step 1: Open the Fields tab
- Step 2: Map fields
- Step 3: Configure Salesforce’s Lead → Contact conversion mapping
- Step 4: Verify the mapping is working
- Should you also map to Salesforce’s standard LeadSource?
- Pushing to custom objects
- What’s next
SourceLoop can write each lead’s first and latest touch, lead quality, and lead value onto Salesforce Leads, Contacts, and Opportunities. In Salesforce you create the fields yourself and map them on the Fields tab. You can also point SourceLoop at fields you already have.
This article walks through the mapping system end to end.
Before you start
You’ll need:
- Salesforce connected to SourceLoop
- A Salesforce user with Modify All Data (or System Administrator profile) for the auto-create flow
- An Admin or Editor role in SourceLoop
The fields SourceLoop can push
On Leads and Contacts:
- Details: name, country, city, and LinkedIn URL
- First touch: Channel, Source, Medium, Campaign, Term, Content, and Landing page
- Latest touch: the same set, for the visit they converted on
- Lead and revenue: Sourceloop Lead quality, Lead score, and Lead value
- Ad click ids from Google, Microsoft, Meta, and LinkedIn
- Your custom fields, such as Service or Budget
On Opportunities:
- First touch and Latest touch Channel, Source, and Campaign, worked out from the people on the deal
- Sourceloop Visits before deal: how many visits the deal’s people made before it was created
- Sourceloop Journey: a link to the deal’s journey in SourceLoop
SourceLoop never changes a deal’s own name, amount, or stage. Your CRM owns those.
Creating the fields
Salesforce doesn’t let apps create fields, so create the ones you want yourself, as text fields on Lead, Contact, and Opportunity, then map them on the Fields tab. Name them however you like, for example “First touch channel”.
Step 1: Open the Fields tab
- Sign in to SourceLoop.
- Open Setup -> CRM and click the Salesforce card.
- Click the Fields tab in the drawer.
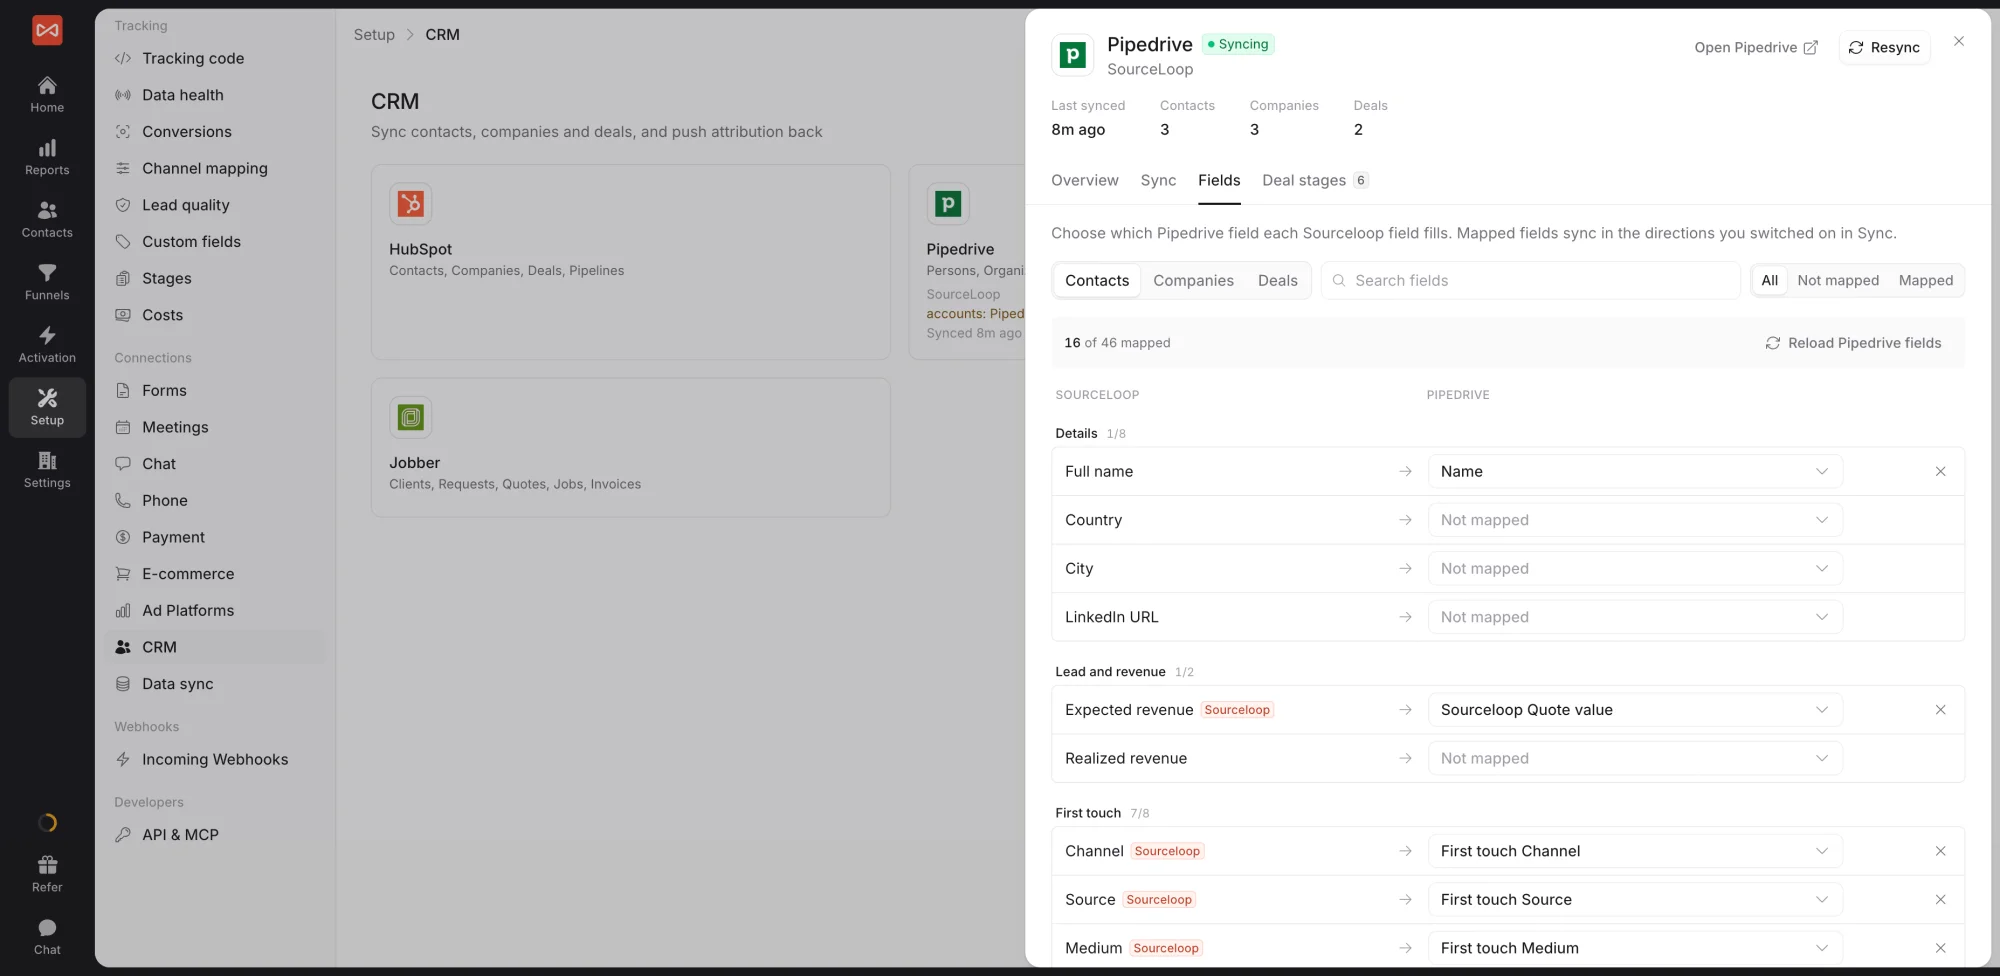
The Fields tab shows one object at a time. Use the tabs at the top to switch between Leads, Contacts, Accounts, or Opportunities. Fields are grouped into Details, Lead and revenue, First touch, Latest touch, Ad click ids, and Custom fields, with a search box and a Not mapped filter. The count at the top shows how many fields are mapped.
Step 2: Map fields
Salesforce doesn’t let apps create fields for you, so:
- In Salesforce Setup, create the fields you want on each object, for example a text field called “First touch channel” on Lead, Contact, and Opportunity.
- Back on the Fields tab, click Reload Salesforce fields.
- Pick your new field in the Salesforce field picker on each SourceLoop row.
Remove a mapping with the x on its row. Mappings save as you make them, and new leads and changes reach Salesforce within minutes.
Step 3: Configure Salesforce’s Lead → Contact conversion mapping
This is the most-missed step. Salesforce’s standard Lead conversion only copies custom fields from Lead to Contact if you’ve explicitly configured the mapping. Without it, your sourceloop_first_source__c value on the Lead gets dropped when the Lead converts to a Contact.
- In Salesforce, go to Setup -> Object Manager -> Lead -> Fields & Relationships -> Map Lead Fields.
- For each
sourceloop_*custom field on Lead, map it to its same-named counterpart on Contact. - Save.
Now your attribution carries through every conversion. If you converted Leads before doing this, the historical conversions won’t have the source data on the Contact, but every conversion going forward will.
Step 4: Verify the mapping is working
- Submit a test lead on your site and wait a few minutes.
- Open the Lead in Salesforce.
- Check the
sourceloop_*custom fields and any standard fields you mapped, values should match what’s shown on the contact in SourceLoop’s Contacts.
If a field isn’t getting written, see Troubleshoot Salesforce sync issues.
Should you also map to Salesforce’s standard LeadSource?
A common question. Two camps:
- Don’t map (default behavior): SourceLoop writes to
sourceloop_*fields. Your team’s existing LeadSource conventions stay intact. Reports built on LeadSource keep working unchanged. SourceLoop adds new fields you can pivot on separately. - Do map: SourceLoop writes first-touch source to
LeadSourcedirectly. Useful when your existing Salesforce reports are heavily built on LeadSource and changing them is more work than letting SourceLoop populate it. Caveat: SourceLoop will overwrite any prior LeadSource value (including manual entry).
There’s no wrong answer, it depends on how much existing Salesforce reporting depends on LeadSource. Most teams start with the default and add the LeadSource mapping later if reporting is awkward.
Pushing to custom objects
Custom objects (e.g., Custom_Application__c) aren’t supported on the Fields tab. For those, use an outgoing webhook (Activation -> Outgoing webhooks) to send raw conversion events as JSON and write to the custom object via an Apex trigger or Flow on your side.
What’s next
After fields are mapped, the next step is aligning SourceLoop’s lifecycle stages with Salesforce’s Lead Status picklist. See Map SourceLoop stages to Salesforce Lead Status.
Frequently asked questions
-
Do I need to create custom fields in Salesforce first?
Yes. Salesforce doesn't let apps create fields, so create the fields you want on Lead, Contact, and Opportunity in Salesforce Setup first, then map them on the Fields tab.
-
Should I map first-touch source to Salesforce's standard LeadSource field?
Personal preference. Mapping to `LeadSource` means SourceLoop overwrites whatever was there (manual entry, web-to-lead default, etc.). If your team already uses LeadSource for high-level categorisation (Web, Partner, Trade Show), it's safer to leave it alone and map SourceLoop to `sourceloop_first_source__c` so both values coexist. Some teams do map to LeadSource specifically so existing Salesforce reports work without modification.
-
Can I push UTMs to the Account record, not just Lead and Contact?
Yes. Add a mapping with entity type 'account' and pick the Salesforce Account field as the target. SourceLoop aggregates UTM values across all Contacts on the Account and writes the consensus value.
-
What about pushing to Opportunity?
Yes. Opportunity-level attribution is supported. The source values come from the converting Lead / Contact (the person who opened the Opportunity), and SourceLoop writes them onto the Opportunity record on each sync.
-
Does the mapping survive Salesforce's Lead → Contact conversion?
Yes, with one caveat. Salesforce's standard conversion only carries fields you've explicitly mapped in its Lead Convert Settings (Setup -> Customize -> Leads -> Lead Custom Field Mapping). After SourceLoop auto-creates `sourceloop_*` fields on both Lead and Contact, you should configure Salesforce's conversion mapping to copy each `sourceloop_*` field from Lead to its Contact counterpart. SourceLoop's docs panel in the Salesforce drawer has a step-by-step on this.
-
My custom field has a Field-Level Security restriction. Will SourceLoop be able to write?
SourceLoop writes via the OAuth-connected user. If that user's profile doesn't have edit access to the field, the write fails silently. Either grant the user FLS edit access, or connect with a System Administrator user.

 Paid Social


