
How to track lead source in Calendly
Capture the lead source, campaign, and full journey behind every Calendly booking so you can tie pipeline back to the channel that drove it.


On this page
- What SourceLoop captures from Calendly
- Before you start
- Step 1: Install the SourceLoop tracking script
- Step 2: Get your Calendly API token
- Step 3: Connect Calendly in SourceLoop
- Step 4: Verify it’s working
- Where to see Calendly bookings
- Contacts
- Traffic and Revenue report
- Funnel reports
- Common issues
If you use Calendly to book meetings and you want to know which marketing channel drove each booking, this guide walks you through the full setup. The whole thing takes about 5 minutes and works on every Calendly plan.
Once configured, every meeting booked through Calendly shows up in SourceLoop with the original source, campaign, and complete pre-booking journey, so you can tie pipeline back to the ad, post, or email that actually drove it.
What SourceLoop captures from Calendly
For every booking, you’ll see:
- First-touch source (e.g.,
google / cpc,linkedin / organic) - Last-touch source before the booking
- UTM parameters from the original landing session:
utm_source,utm_medium,utm_campaign,utm_content,utm_term - Landing page and full referrer chain
- First seen and last seen timestamps
- Full journey (every page the visitor viewed before booking)
- Booking details (invitee name and email, fetched via the Calendly API)
- Device, location, and browser
All of this lands on Contacts as a new lead, where you can expand any row to see the complete journey timeline.
Before you start
You’ll need:
- A SourceLoop account (sign up free if you don’t have one)
- Admin access to the site Calendly is embedded on (or where the booking link is shared)
- A Calendly account (any plan, including Free)
Step 1: Install the SourceLoop tracking script
- Log in to SourceLoop.
- In the sidebar, go to Setup -> Tracking code.
- Copy the tracking script shown on that page.
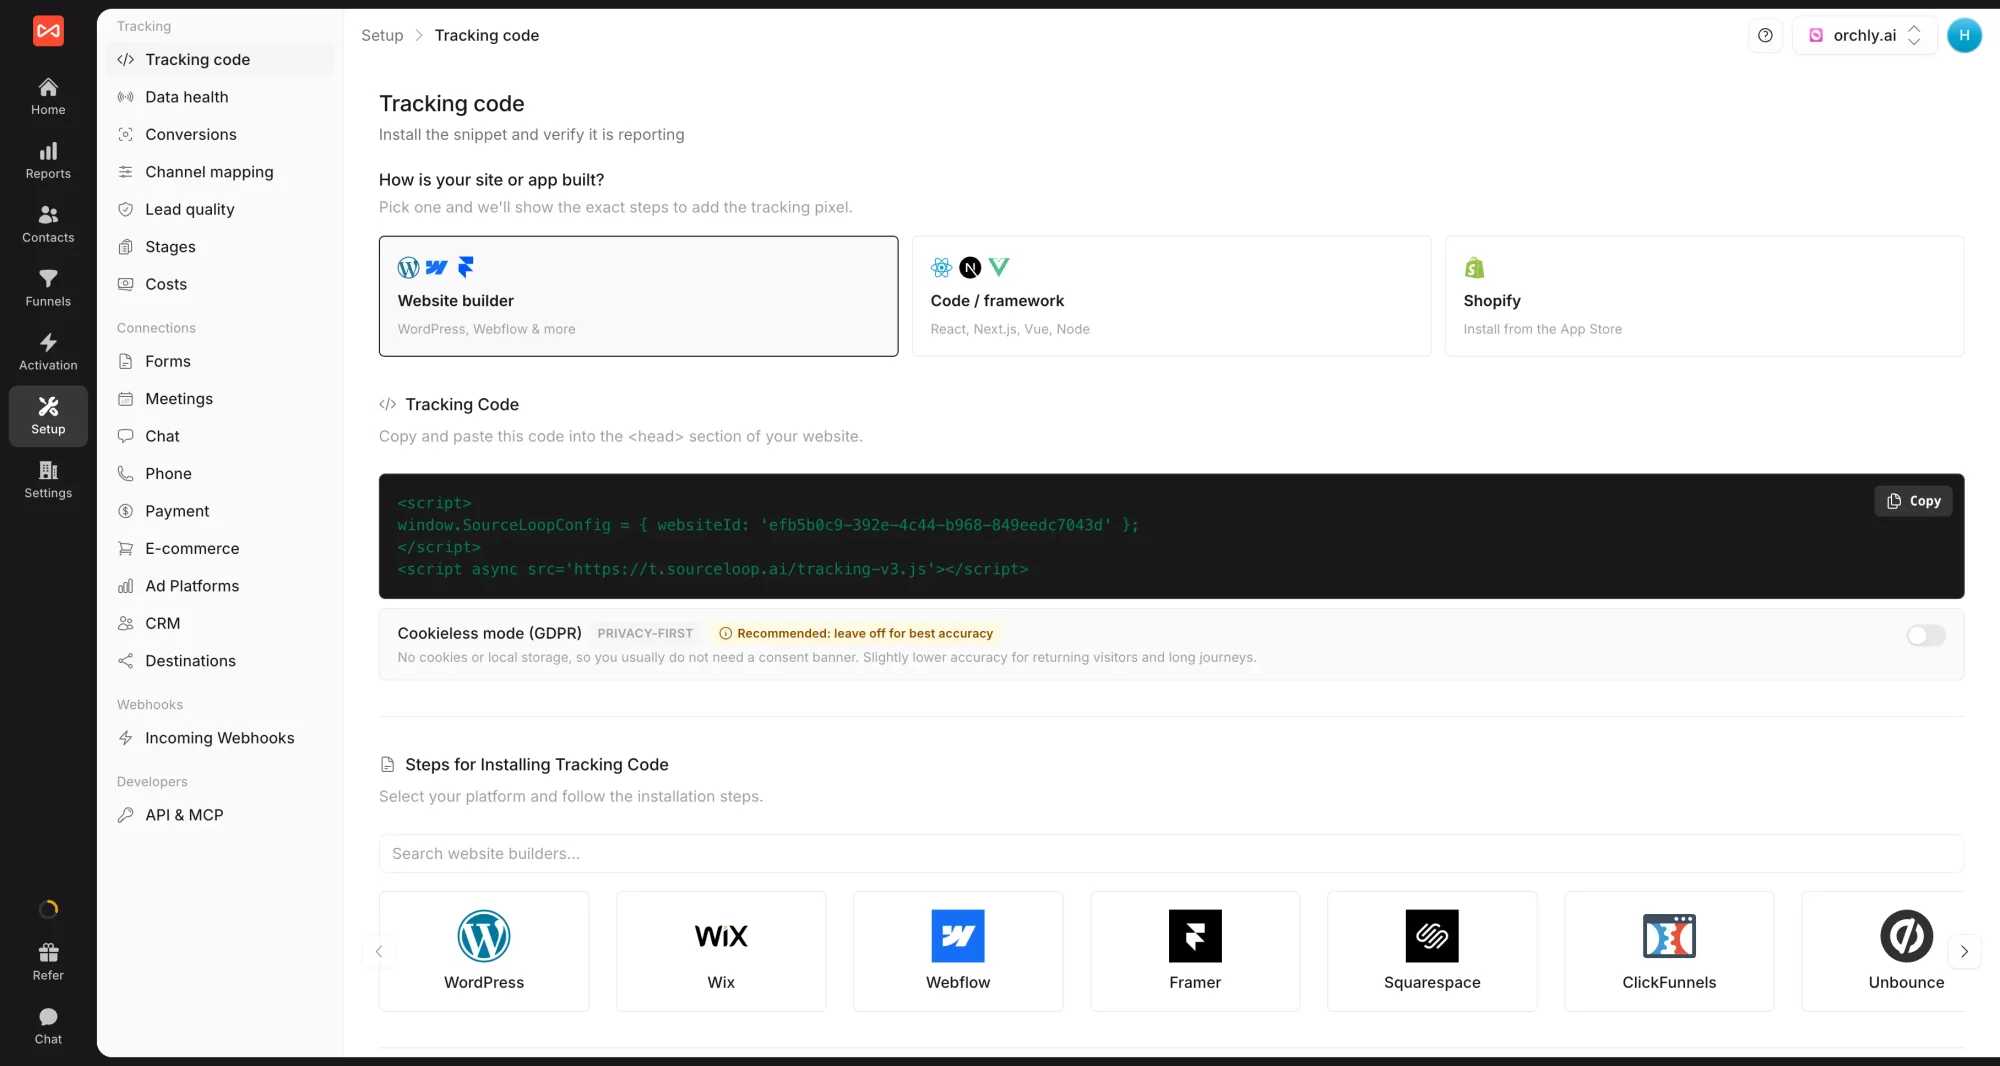
- Paste the script inside the
<head>tag of every page on your site, including the page where your Calendly link or embed lives.
Once installed, SourceLoop starts capturing visitor source and journey data automatically. The next steps link those visits to the actual Calendly bookings.
Step 2: Get your Calendly API token
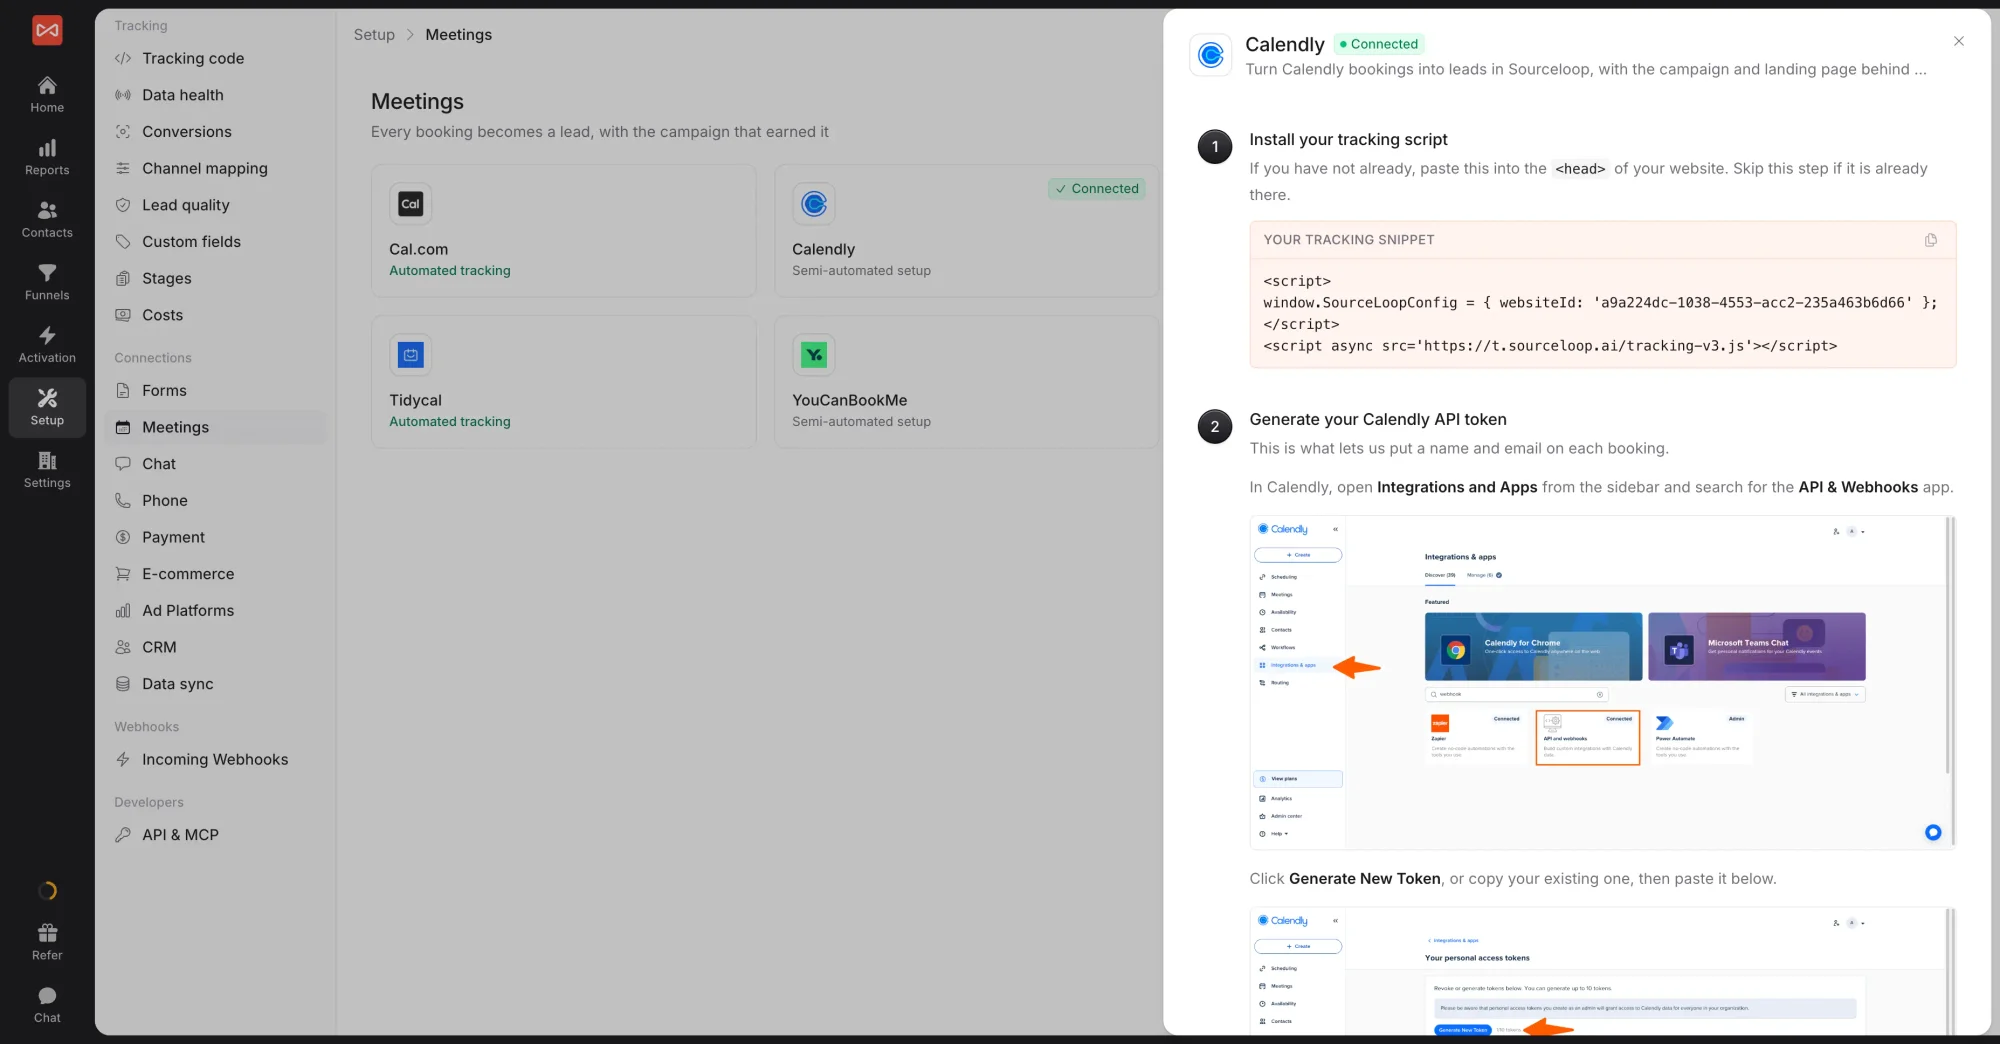
Calendly doesn’t expose the invitee’s name and email in its public booking events, so SourceLoop needs a token to call the API and fetch those details. Here’s how to generate one:
- Log in to Calendly.
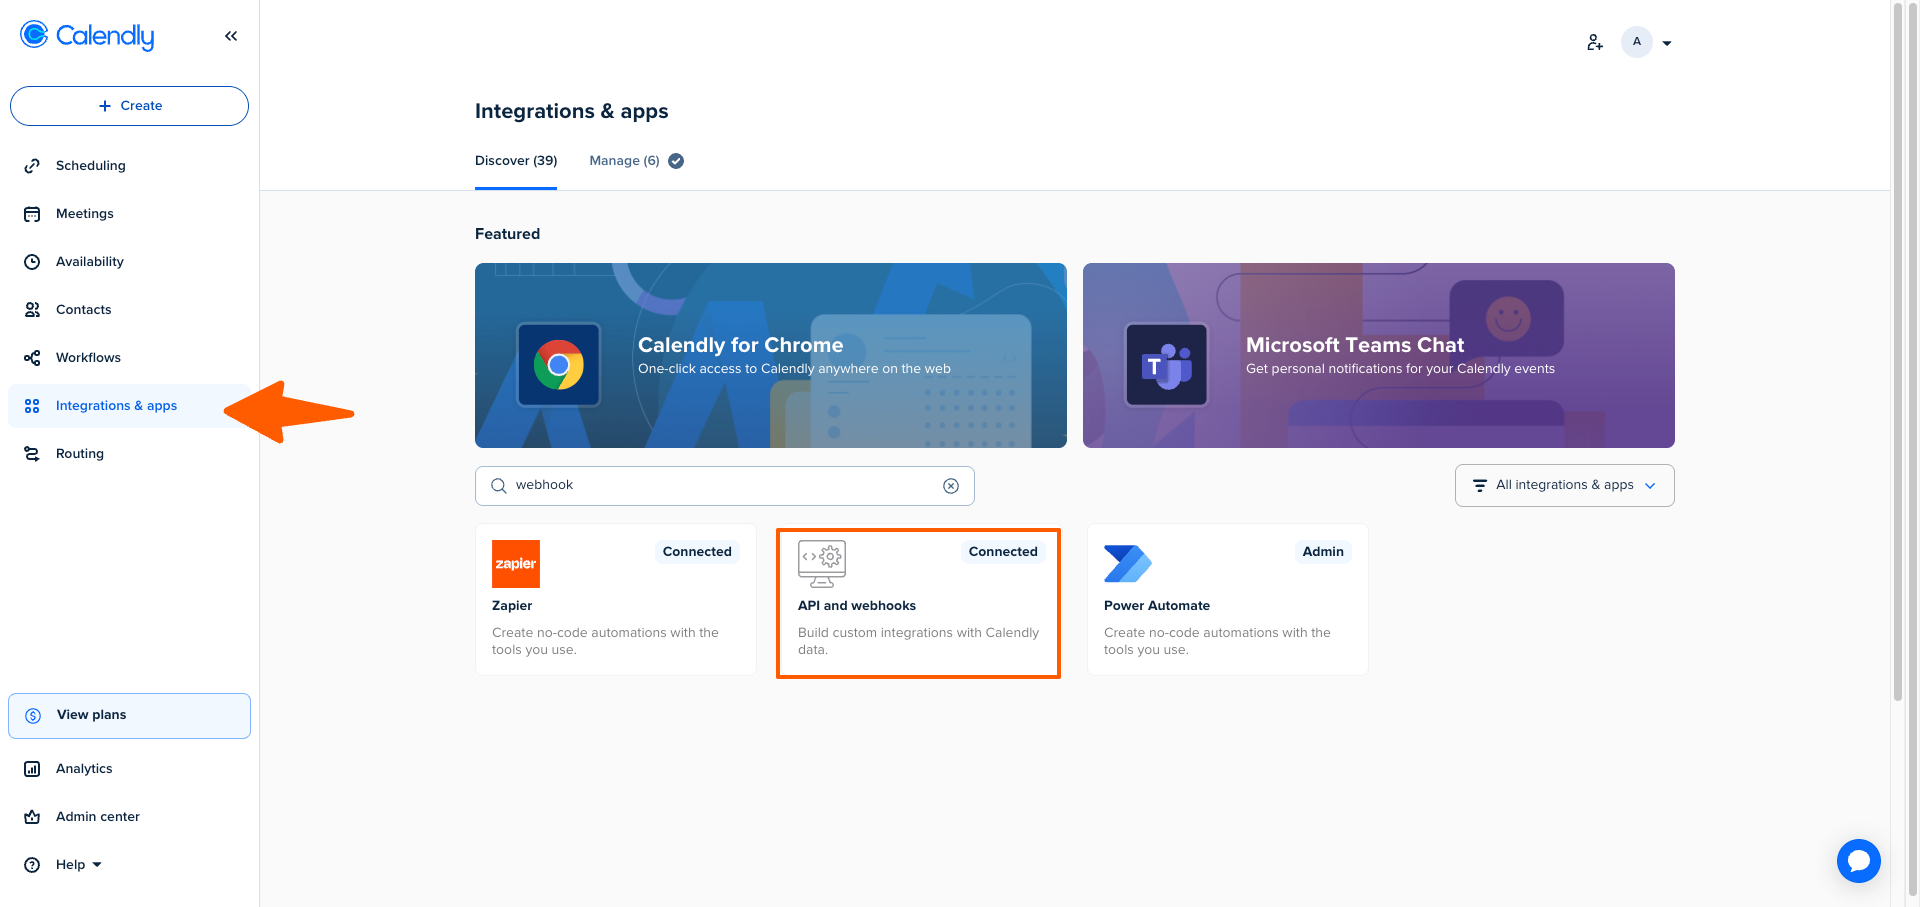
- Click Integrations and apps in the left sidebar, then search for API & Webhooks.
- Click Generate New Token (or copy your existing one if you already have one).
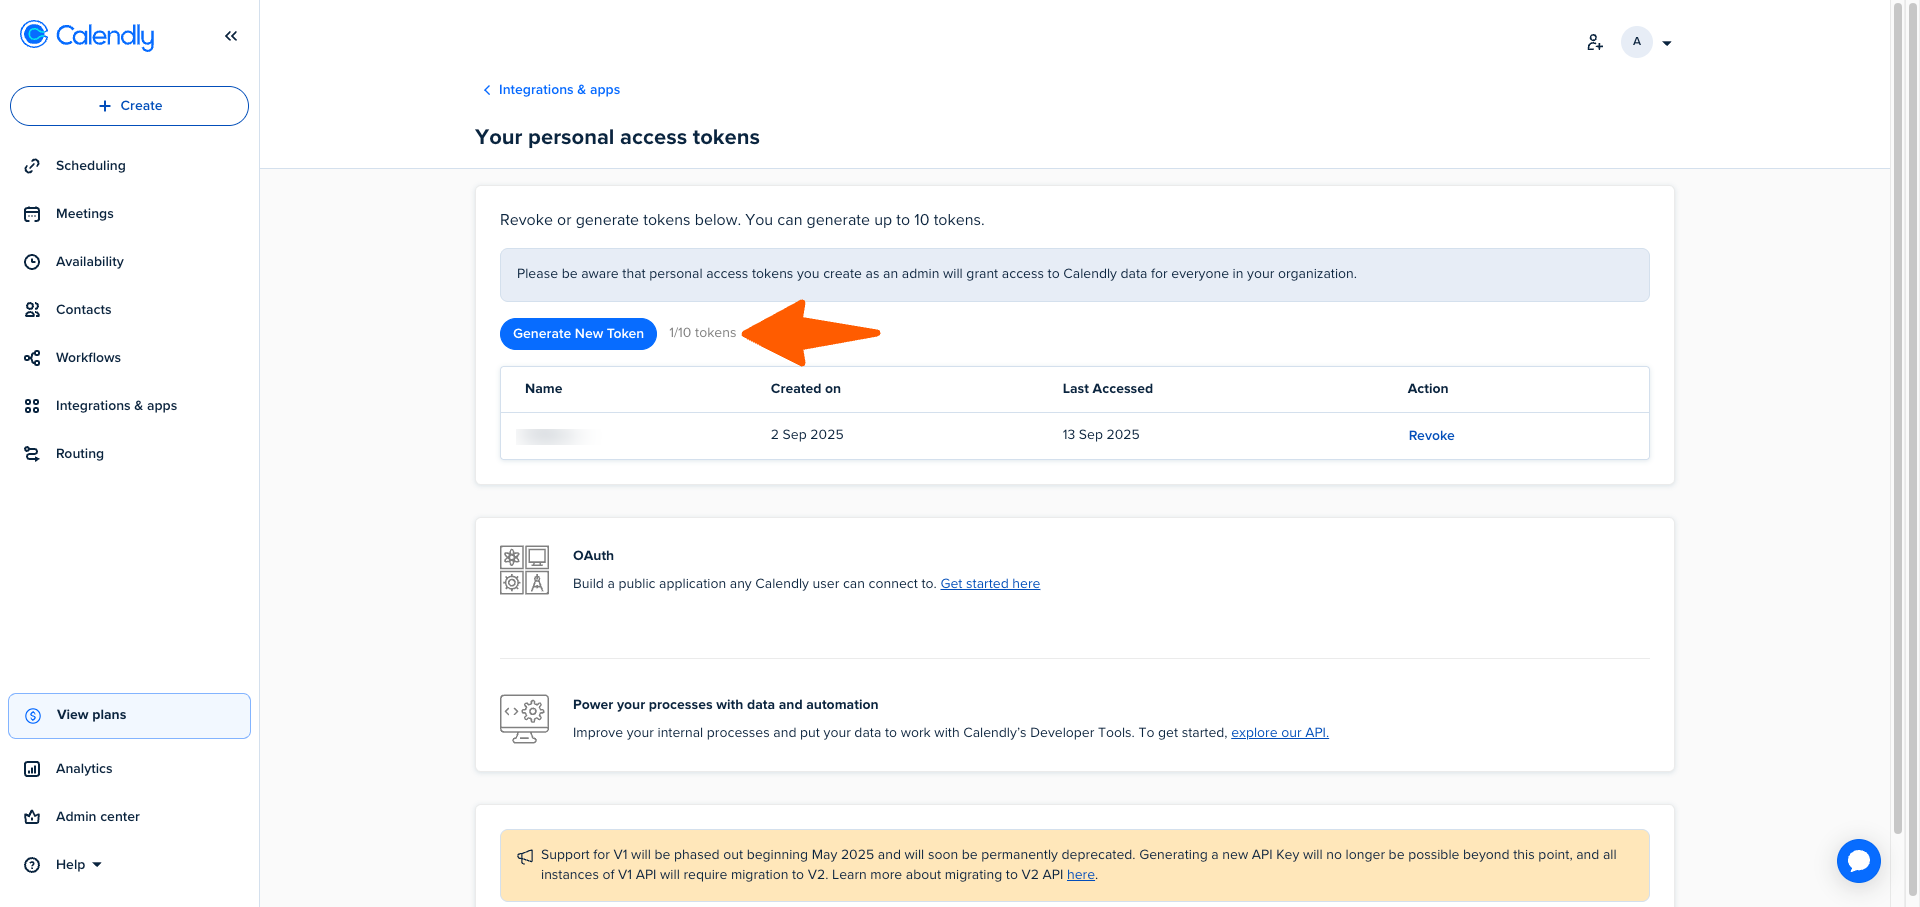
- Copy the token. Keep this tab open, you’ll paste it into SourceLoop in the next step.
Step 3: Connect Calendly in SourceLoop
- Back in SourceLoop, go to Setup -> Meetings.
- Click Calendly in the list of meeting tools.
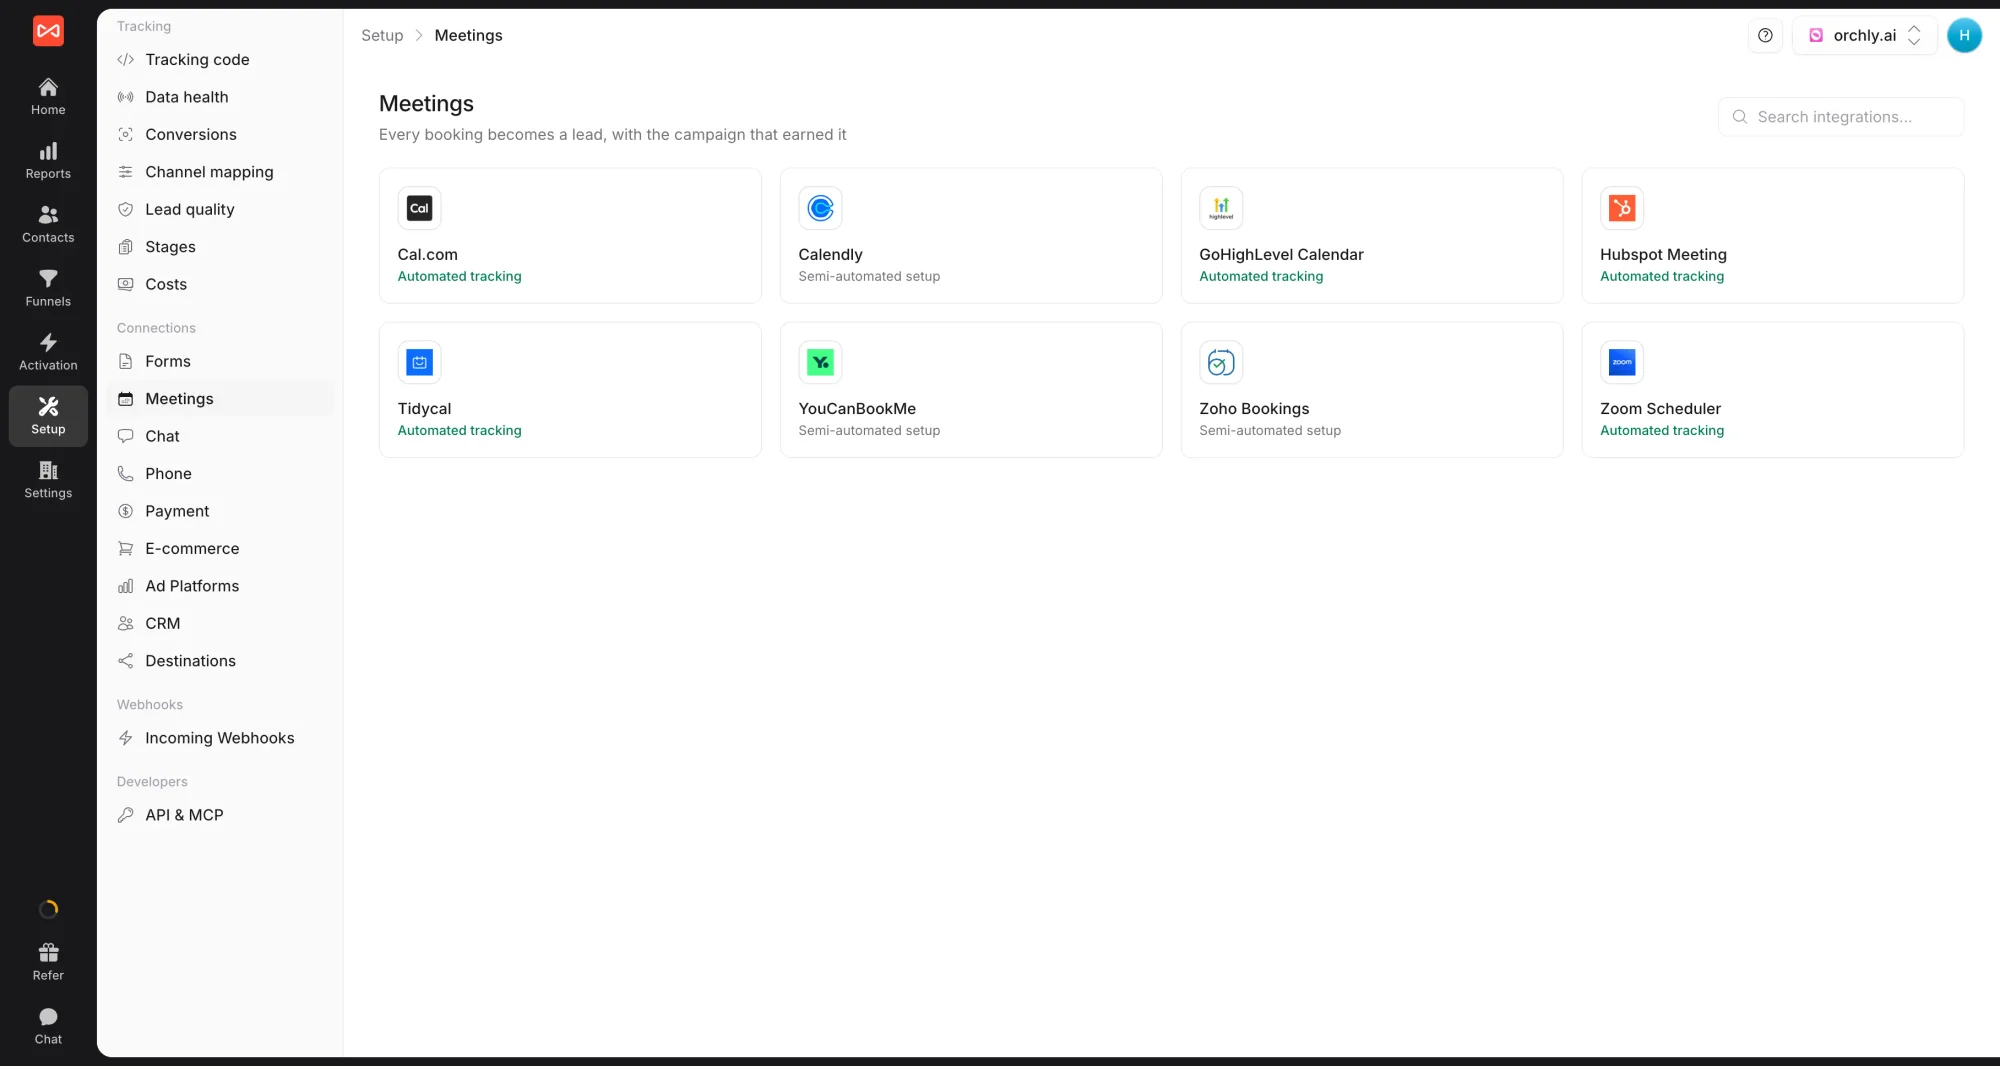
- A drawer opens on the right with a tab to enter your Calendly API key. Paste the personal access token you copied in the previous step.
- Click Save.
From this point on, whenever someone books a meeting through Calendly, SourceLoop will:
- Detect the booking from your tracking pixel (or from the Calendly API if the link was shared off-site)
- Call the Calendly API in the background to fetch the invitee’s name and email
- Stitch the booking onto the visitor’s existing journey
- Surface it as a new lead on Contacts within a few seconds
Step 4: Verify it’s working
Book a test meeting on yourself: open your site in an incognito window, navigate to the page with the Calendly link, append ?utm_source=test&utm_campaign=verify to the URL, then book a meeting using a real email address.
Within ~10 seconds, the booking should appear on Contacts with the test UTMs attached.
Where to see Calendly bookings
Once the integration is live, every booking shows up in three places inside SourceLoop:
Contacts
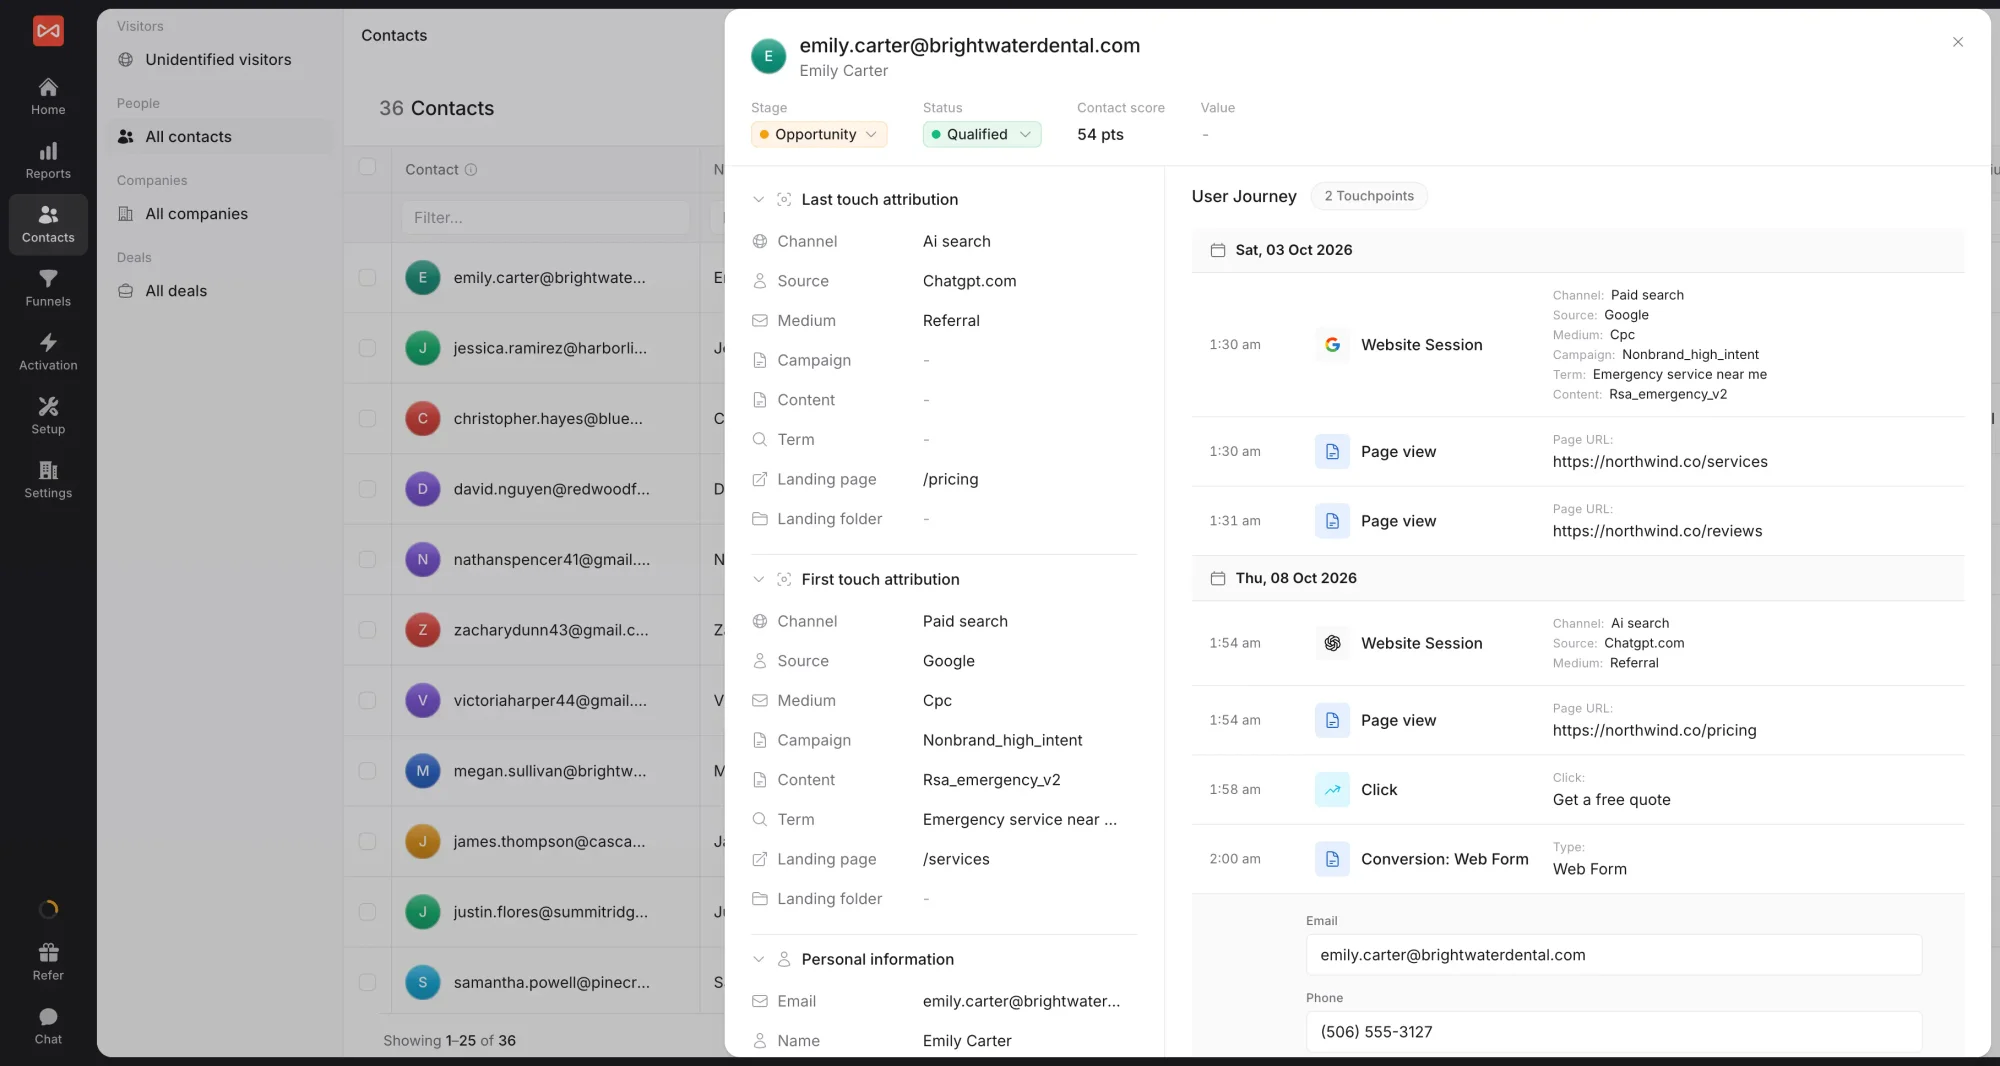
Every booking is a new contact row, view them at app.sourceloop.ai/contacts. Click any row to expand the complete pre-booking journey, every page the visitor viewed, every UTM they touched, and every previous session leading up to the booking.
Traffic and Revenue report
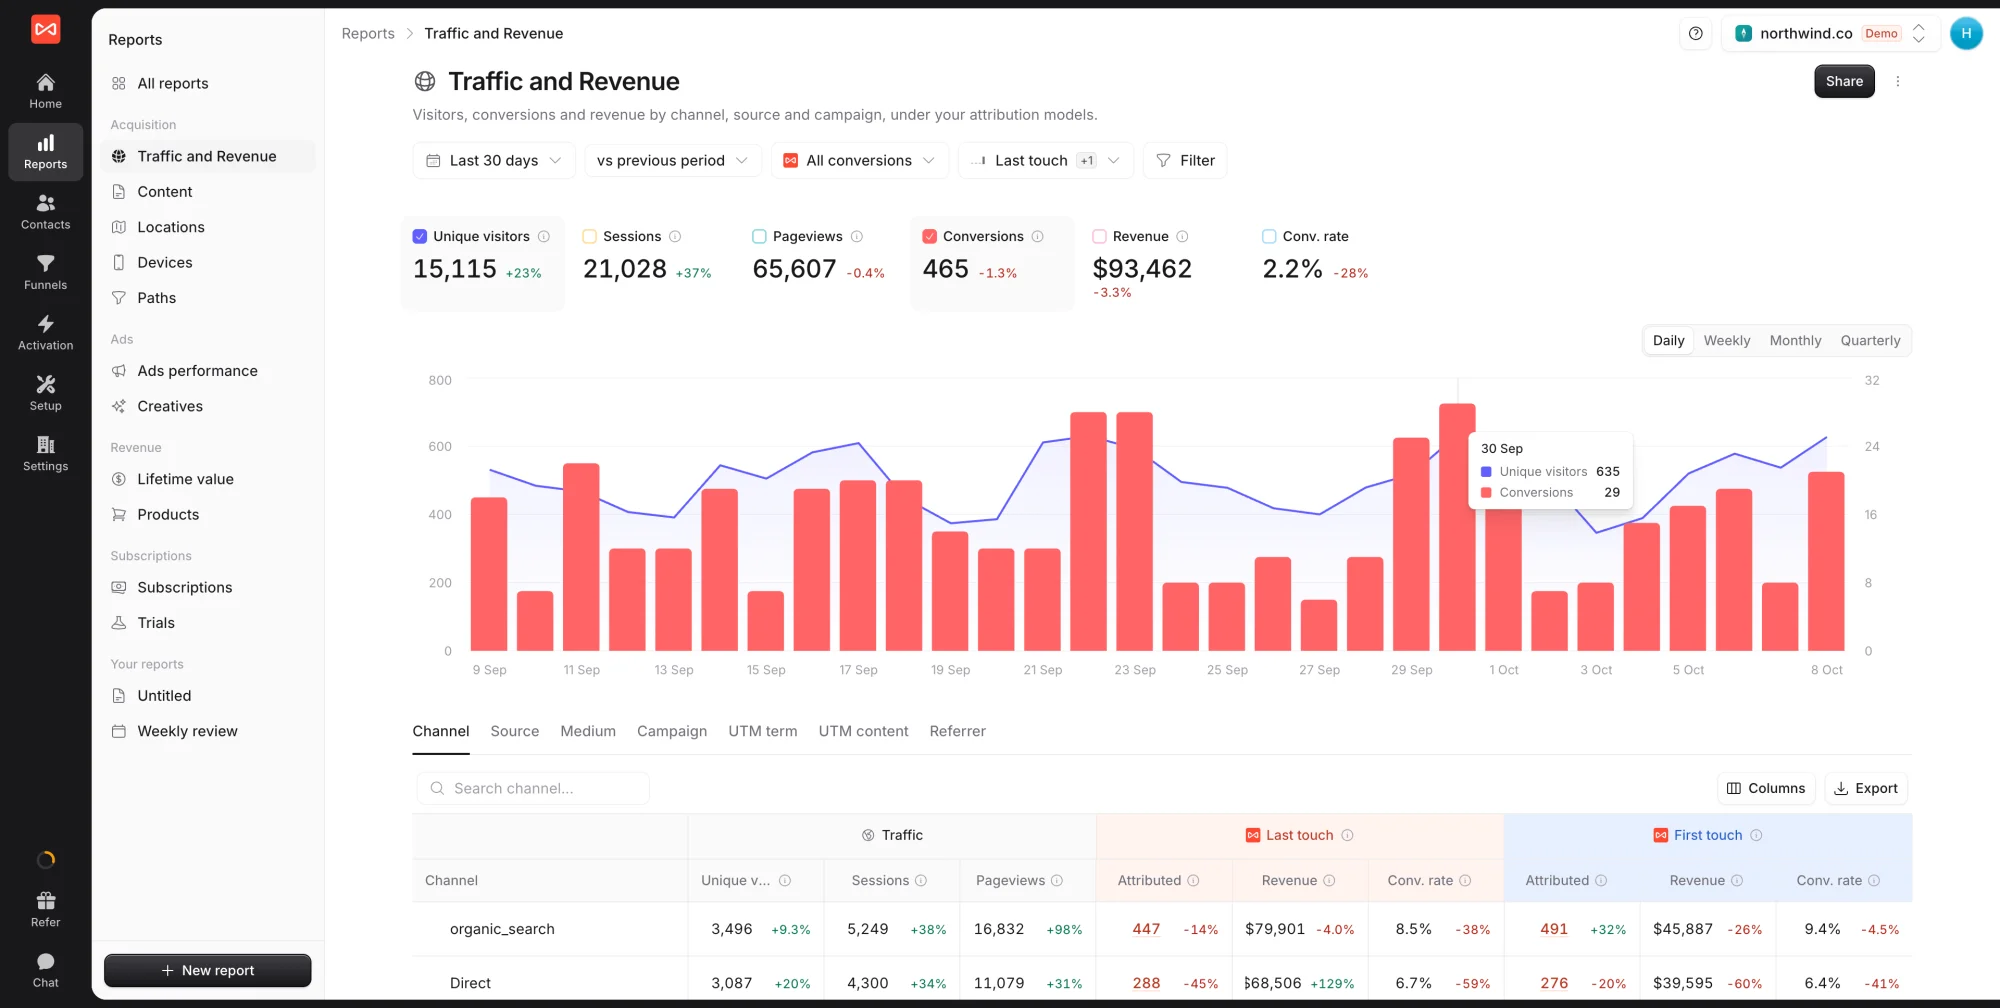
Open the Traffic and Revenue report at app.sourceloop.ai/reports/traffic to see Calendly bookings counted as conversions, broken down by source, campaign, channel, and landing page. Compare paid vs. organic, identify your best-performing campaigns, and see which content drives meetings.
Funnel reports
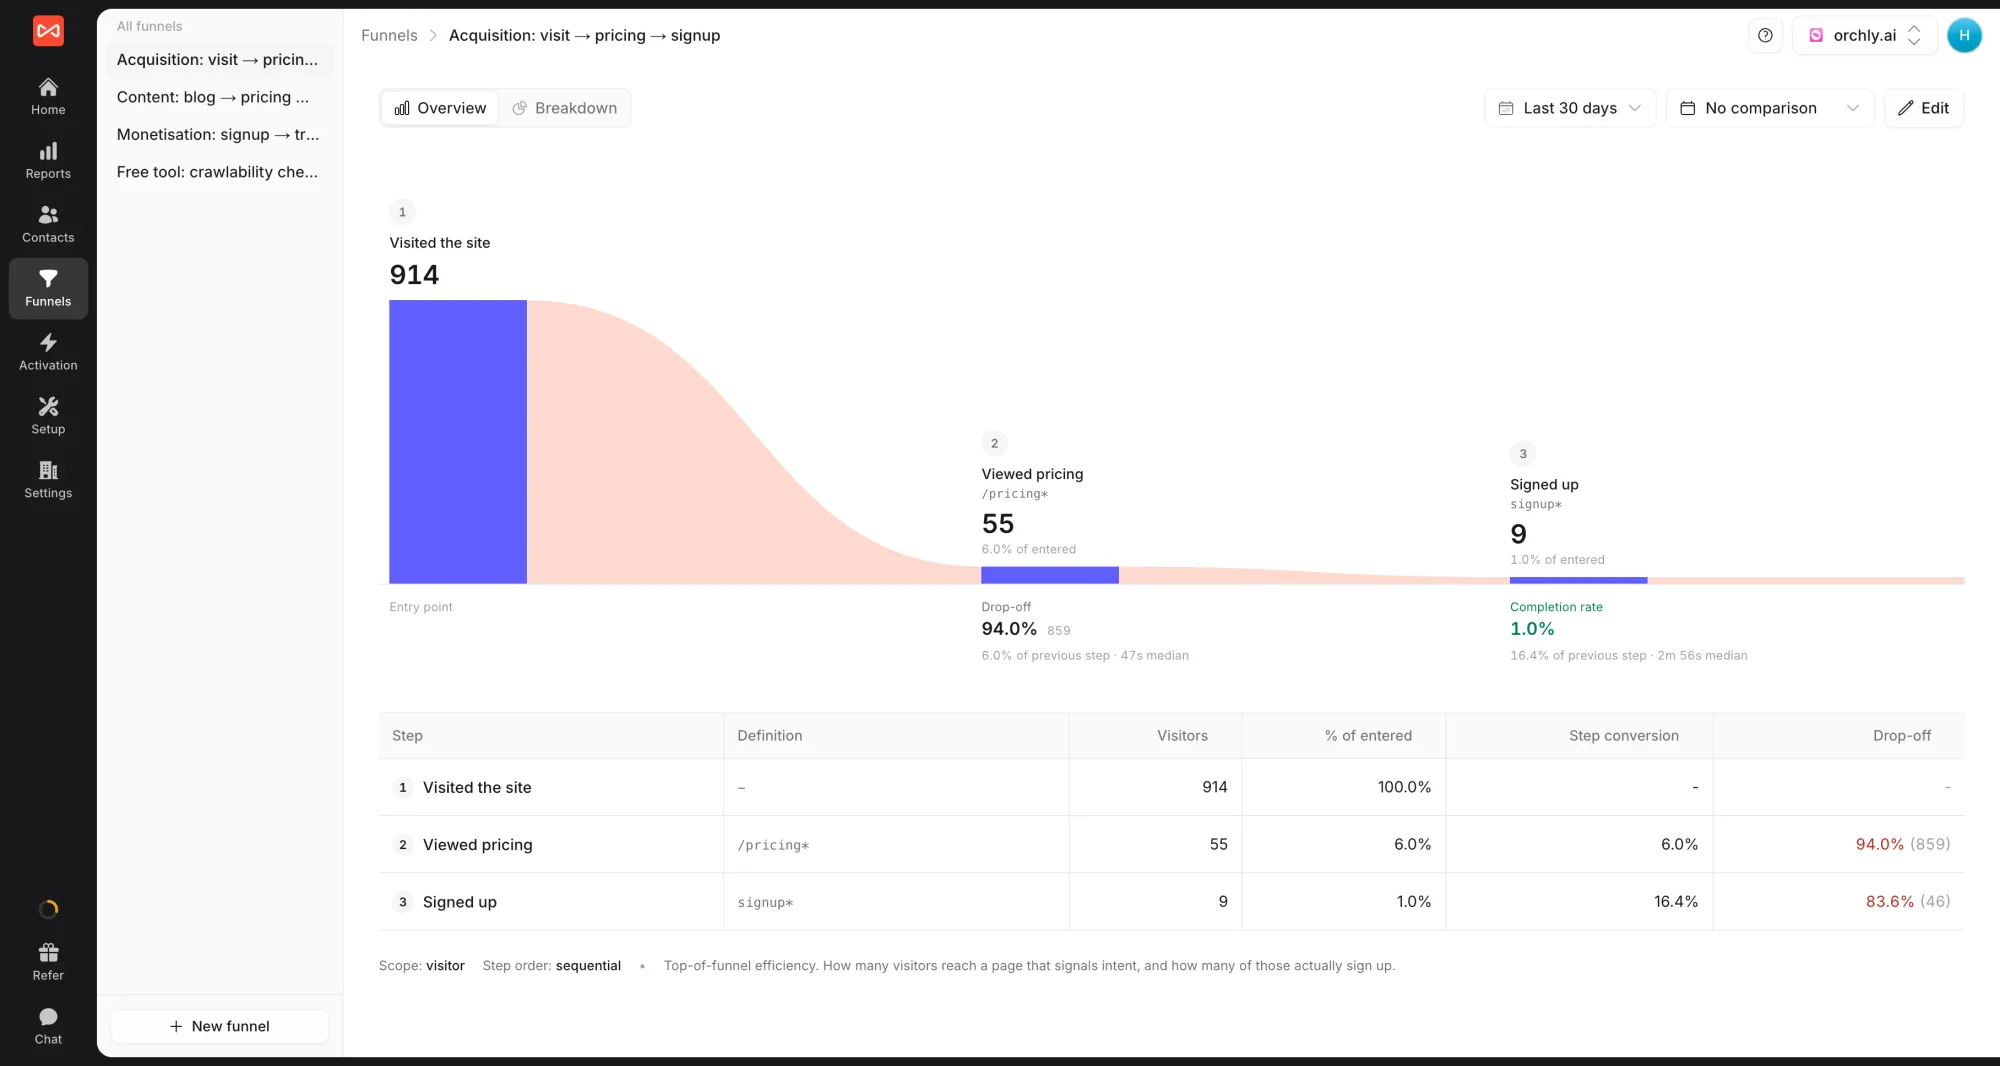
Head to app.sourceloop.ai/funnels and add “Calendly booking” as a step in any funnel to measure conversion rate from any campaign, ad set, or page to a booked meeting, then slice by source to see which channel converts best.
You can also push Calendly bookings as offline conversions to Google Ads and Meta so their bidding algorithms can optimize for real meetings instead of vanity form fills. See The conversion sync guide for the offline-conversions setup.
Common issues
That’s it. From here, every meeting Calendly books is automatically tied back to the campaign that drove it.
Frequently asked questions
-
Do I need a paid Calendly plan?
No. The personal-access token used here is available on every Calendly plan, including Free.
-
Does this work for embedded Calendly widgets too?
Yes. As long as the SourceLoop tracking pixel is installed on the page where the embed lives, bookings made through the embed are captured the same way.
-
Will SourceLoop see bookings that come from links shared in email or DMs (not from my site)?
Those bookings will still be captured because of the API token, but they won't have web journey data attached, since the visitor never landed on a page with the pixel. They'll show up as "Direct" source.
-
Where do the booking name and email come from?
Calendly's API. SourceLoop calls the API in the background using your token, fetches the invitee's details, and stitches them onto the attribution record automatically.
-
Is my Calendly API token safe?
Yes. SourceLoop encrypts API tokens at rest. They're only used server-side to fetch booking details and are never exposed in the browser.

 Paid Social


